Rubber Flooring Installation
Rubber flooring might be the perfect solution for your home or business. At San Francisco Flooring Company, we specialize in installing high-quality rubber flooring that stands up to heavy use while looking great.
Our expert installers work with rubber flooring in various spaces including gyms, commercial buildings, and homes throughout the San Francisco Bay Area. We bring years of experience and professional craftsmanship to every project, ensuring your new floors are installed correctly the first time.
We understand choosing the right flooring material is important. Rubber offers excellent sound absorption, shock resistance, and comes in many designs to match your style. Our team will help you select the best rubber flooring option and handle the entire installation process from start to finish.
Installation Process
We follow a systematic approach to provide you with beautiful, durable floors that meet your specific needs.
1. Subfloor Preparation
Before we begin any rubber flooring installation, we thoroughly assess and prepare the subfloor. This critical first step ensures your new flooring will perform optimally for years to come.
We start by removing all existing flooring materials and adhesives to create a clean surface. Any debris or dust is meticulously cleaned away, as even small particles can affect the final result.
Next, we inspect the subfloor for cracks, unevenness, or moisture issues. These problems must be addressed before installation proceeds. Cracks are filled with appropriate patching compounds, while uneven areas are leveled using self-leveling compounds.
Moisture testing is particularly important for rubber flooring. We use specialized meters to measure moisture content and may recommend moisture barriers if readings exceed acceptable levels.
2. Cutting and Fitting Rubber Materials
Once the subfloor is properly prepared, we begin the precise work of cutting and fitting the rubber flooring materials to your space.
We carefully measure the installation area and create detailed layout plans before making any cuts. This helps minimize waste and ensures proper alignment of seams and patterns.
For roll rubber flooring, we unroll the material and allow it to acclimate to room temperature for 24-48 hours. This prevents expansion or contraction after installation.
Our technicians use professional-grade cutting tools like utility knives with fresh blades or specialized rubber cutters for clean, precise edges. For complex cuts around fixtures or corners, we create templates to ensure perfect fits.
We typically leave a small gap (about 1/4 inch) around the perimeter to allow for potential expansion with temperature changes.
3. Securing the Rubber Flooring
Proper adhesion is crucial for rubber flooring performance. We use different methods depending on your specific needs and the type of rubber flooring selected.
For permanent installations, we apply appropriate adhesives using notched trowels to ensure even coverage. The type of adhesive varies based on the rubber material and subfloor conditions.
Adhesive Types We Use:
- Water-resistant urethane adhesives for high-moisture areas
- Pressure-sensitive adhesives for easier future replacement
- Double-sided tape for temporary installations
After applying adhesive, we carefully place the rubber material, working from the center outward to prevent air bubbles. We use heavy rollers (100-150 lbs) to firmly press the material into the adhesive.
For interlocking rubber tiles, we carefully align the connectors and press firmly to ensure secure connections throughout the floor.
4. Finishing Touches and Detailing
The final phase of our installation process focuses on details that enhance both function and appearance of your new rubber flooring.
We carefully inspect all seams and edges, making any necessary adjustments to ensure a uniform appearance. For areas where rubber flooring meets other surfaces, we install appropriate transition strips or reducers to create safe, attractive transitions.
Our team applies edge sealants where needed to prevent moisture intrusion and extends the life of your flooring. In areas with heavy equipment or furniture, we may install additional reinforcement to prevent damage.
After installation, we thoroughly clean the new flooring using manufacturer-recommended products. We'll provide you with specific care instructions for your particular rubber flooring type.
We conduct a final walkthrough with you to ensure complete satisfaction before considering the project complete.
5. After Installation Care and Maintenance
Congratulations on your new rubber flooring! Now that we've completed the installation, proper maintenance will help your floors stay beautiful for years to come. Regular cleaning is essential for rubber floors. Simply sweep or vacuum to remove dirt and debris. For deeper cleaning, use a mild detergent mixed with warm water.
Avoid These Cleaning Products:
- Harsh chemicals
- Abrasive cleaners
- Oil-based products
- High-pH cleaners
For spills, quick action is important. Wipe them up promptly to prevent staining or damage to the adhesive underneath. We recommend placing mats at entrances to catch dirt and moisture before they reach your flooring. This simple step significantly reduces wear over time.
Types of Rubber Flooring Offered
We source high-quality materials from top brands including Shaw, Johnsonite, Burke, and Roppe to ensure durability and performance.
Interlocking Rubber Tiles
Interlocking rubber tiles are one of our most popular options due to their ease of installation and versatility. These tiles snap together without adhesives, making them perfect for DIY projects or temporary installations.
These tiles work exceptionally well in home gyms, playrooms, and commercial fitness centers. The interlocking design creates a seamless look while allowing for thermal expansion. We offer both standard black recycled rubber options and premium color-flecked designs that can enhance your space's appearance while providing the durability you need.
Rubber Rolls
Our rubber flooring rolls provide continuous, seamless coverage ideal for larger areas. Made in the USA with eco-friendly recycled materials, these rolls offer exceptional durability and resilience. The rubber rolls we carry include:
- Standard black rolls (3/8" to 1/2" thickness)
- Color-flecked options for more design flexibility
- Custom-cut lengths to minimize waste
- Low-odor indoor options for sensitive environments
Rubber rolls are perfect for commercial gyms, schools, and industrial settings where continuous coverage is needed. The seamless installation reduces trip hazards and creates a cleaner look. We can cut rolls to your exact specifications, saving you money and reducing installation time. Our heavy-duty options withstand equipment movement and high traffic while providing sound and impact absorption properties.
Rubber Mats
For targeted protection in specific areas, our rubber mats provide the perfect solution. These pre-cut pieces come in standard sizes and thicknesses to protect floors and equipment. Popular applications include:
- Equipment mats for treadmills and weight machines
- Anti-fatigue mats for standing workstations
- Entrance mats for high-traffic areas
- Transition mats between different flooring types
The mats range from 1/4" to 1" in thickness depending on your needs. Many feature beveled edges to prevent tripping and allow for smooth transitions. We carry options with different surface textures, including smooth, diamond-plate, and corrugated designs to address specific functional requirements. These mats are easy to clean and maintain, making them practical for both residential and commercial settings.
Maintenance and Care for Your Rubber Flooring
Proper maintenance of your rubber flooring will keep it looking great and extend its lifespan for years to come. Regular cleaning and prompt attention to spills are essential for preserving your investment.
Daily Cleaning Recommendations
We recommend sweeping or dust-mopping your rubber flooring daily to remove dirt, dust, and grit that can scratch the surface. Use a soft-bristled broom or a vacuum cleaner without a beater bar to prevent damage.
For regular cleaning, a damp mop with mild soap and warm water works best. Avoid using harsh chemicals or abrasive cleaners that might damage the rubber surface.
- Do use: Mild dish soap, pH-neutral cleaners
- Don't use: Bleach, ammonia, or oil-based products
After mopping, allow the floor to air dry completely. Excess moisture can seep between seams and affect adhesion over time.
We suggest maintaining a regular cleaning schedule to prevent dirt buildup. This simple habit drastically reduces the need for deep cleaning later.

Dealing With Spills and Stains
Act quickly when spills happen on your rubber flooring. Prompt cleanup prevents staining and damage to the material. For liquid spills, blot with absorbent paper towels or a clean cloth. Avoid scrubbing, which might push the liquid deeper into the flooring.
For stubborn stains, we recommend:
- Mix a solution of mild soap and warm water
- Gently scrub the area with a soft cloth or sponge
- Rinse thoroughly with clean water
- Dry completely with a towel
Oil-based stains require special attention. Use a rubber-safe degreaser and follow the manufacturer's instructions carefully. Some chemicals can discolor rubber flooring. Always test cleaning products on an inconspicuous area first before applying to visible sections.
Long-Term Maintenance Tips
Protect your rubber flooring from excessive sunlight exposure, which can cause fading over time. Consider window treatments for areas with direct sunlight.
Apply a rubber floor finish annually to maintain appearance and protect against wear. We can recommend specific products suitable for your particular flooring type.
Place protective mats at entrances to catch dirt and moisture before they reach your rubber floors. This simple step significantly reduces wear in high-traffic areas.
For furniture, use protective pads under legs to prevent indentation. Avoid dragging heavy items across the floor, which can cause tearing or gouging.
Inspect your rubber flooring periodically for signs of damage or loose seams. Early detection allows for quick repairs before problems worsen.
How to Get Started with Your Flooring Project
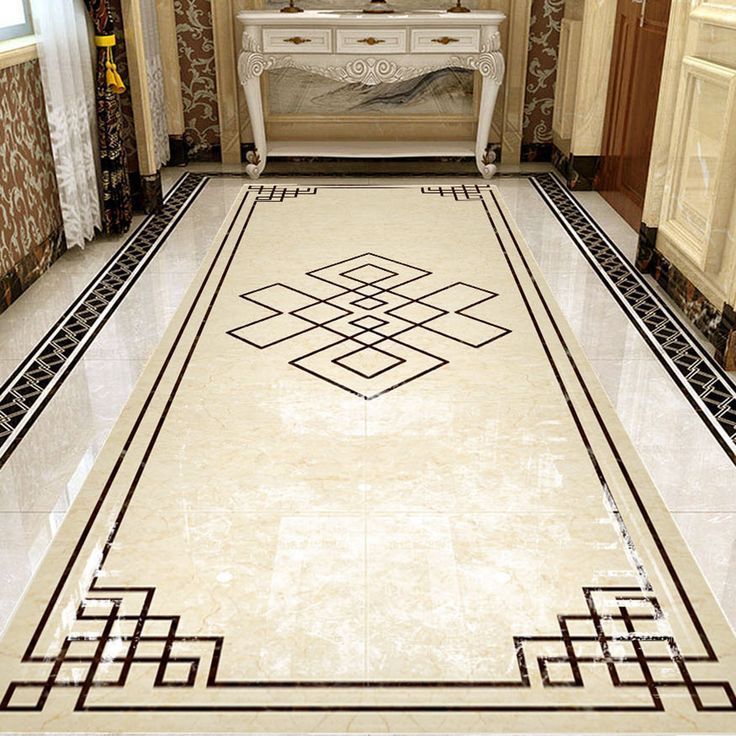
We handle every step of your custom inlay and floor design project with precision and expertise, following a proven process to bring your vision to life.
Schedule a Meeting
Our design consultants meet with you at your San Francisco location to discuss your ideas and assess the space. We'll examine your current flooring, take detailed measurements, and note any specific requirements or challenges.
During this meeting, we'll review our portfolio of custom inlay designs and floor patterns. We encourage you to share inspiration photos or sketches of your desired design.
We'll also discuss material options suited for your space, from hardwood species to stone varieties and decorative elements.
Project Timeline
Our typical custom inlay projects take 2-4 weeks from design approval to completion. The first week focuses on finalizing the design and material selection.
Production of custom inlay elements requires 5-7 business days. Installation timing varies based on project size:
- Small inlays (under 100 sq ft): 2-3 days
- Medium projects (100-300 sq ft): 4-5 days
- Large installations (300+ sq ft): 1-2 weeks
FAQs About Rubber Floors
Custom inlay and floor design services require specialized expertise, premium materials, and meticulous craftsmanship to create distinctive patterns that enhance any space.
How long does rubber flooring installation typically take?
Most residential spaces (500-1000 sq ft) take 1-2 days. Commercial installations can take 3-7 days depending on square footage, subfloor preparation requirements, and pattern complexity. Allow additional time if old flooring needs removal.
What subfloor preparation is needed before installing rubber flooring?
The subfloor must be clean, dry, level, and free of cracks. Concrete subfloors require moisture testing (below 3 lbs/1000 sq ft/24 hrs). Wood subfloors need reinforcement if flexible. Uneven floors require grinding or self-leveling compound. All adhesives or residue must be completely removed.
Will rubber flooring smell after installation?
Yes, temporary odor is normal. Most rubber flooring has a distinct smell that dissipates within 2-4 weeks after installation. Proper ventilation speeds up this process. Low-VOC rubber products are available for odor-sensitive environments.
How do I maintain newly installed rubber flooring?
Clean with a neutral pH cleaner - never use harsh chemicals, bleach, or oil-based products. Sweep/vacuum daily to remove abrasive particles. Damp mop weekly. Avoid standing water. Apply manufacturer-recommended floor finish every 6-12 months in high-traffic areas.
What's the average cost for professional rubber floor installation?
Expect $6-$12 per square foot including materials and labor. Thicker rubber or custom patterns cost more. Commercial-grade installations range from $8-$15 per square foot. Most contractors require 50% deposit before beginning work.
